 blog
Modern Photo Booth Setup Ideas for Events and Parties
Last Updated: November 7, 2026
Quick Summary
A modern photo booth setup starts with the backdrop, since it fills most of the frame in every guest photo. Match the backdrop to the event and room, then choose a layout and lighting that suit the venue size.
- Choose a backdrop that suits the event, since a wrong choice shows in every photo.
- Use a backdrop about shoulder height and wide enough to fill the frame behind two or three people.
- Choose silk or hybrid flowers over fresh ones for events lasting more than a few hours.
- Place the main light in front of guests, slightly to one side, and add a fill light opposite.
- Measure the room first and plan around backdrop width, camera distance, and guest standing zone.
Table of Contents
- Modern Backdrop Ideas That Photograph Well
- Photo Booth Ideas for Events Across Different Venue Sizes
- Modern Photo Booth Setup Ideas for a DIY Build
- Lighting Ideas That Make Guests Look Their Best
- Free Photo Booth Design Templates and Layouts to Start From
- Props, Accessibility, and Guest Experience Details
- Book Your Event Photo Booth With Agondray Entertainment
- Frequently Asked Questions
Modern Backdrop Ideas That Photograph Well
Modern photo booth setup ideas start with the backdrop, because it fills most of the frame in every photo guests take. A good backdrop makes a simple booth look expensive.
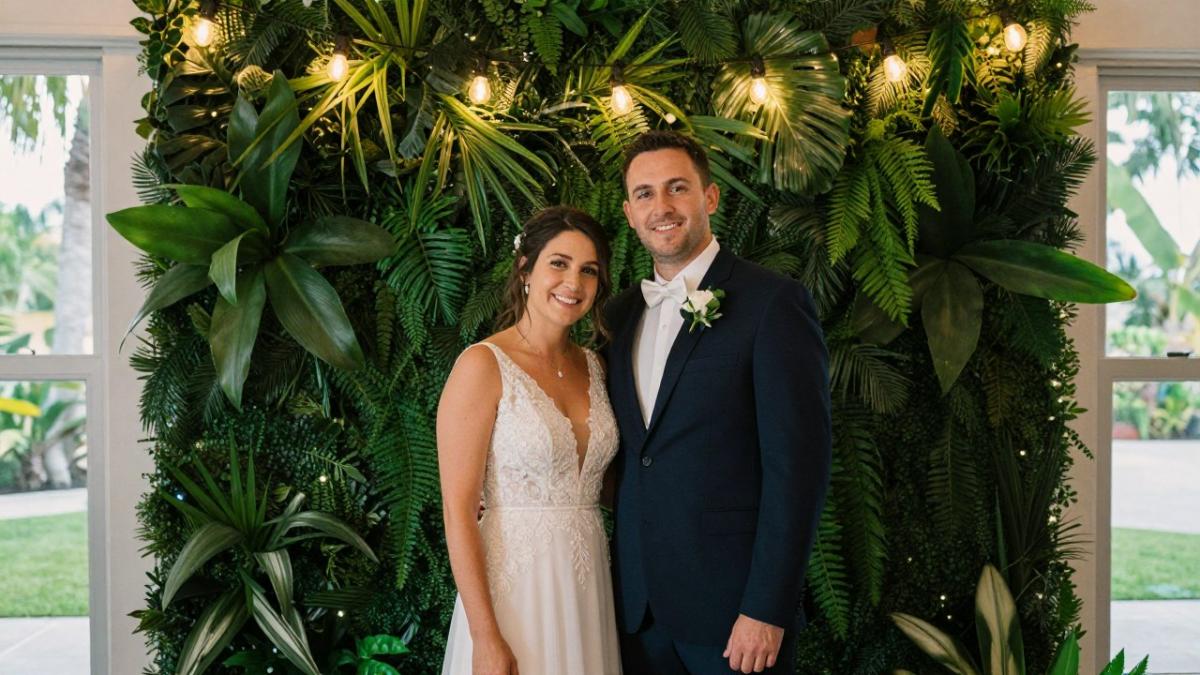
Think about the event first. A backdrop that suits a Florida wedding will not suit a corporate holiday party. The wrong choice shows in every picture, so match the backdrop to the room and the crowd.
Common backdrop styles include:
- Greenery walls and floral installations
- Marble panels with clean, neutral tones
- Neon or custom signs with names, dates, or short messages
Greenery walls and floral installations
A greenery wall is one of the most requested options for weddings and garden parties. It adds depth and color without much visual noise.
Keep the floral wall at about shoulder height and wide enough to fill the frame behind two or three people. Guests tend to stand close together, so a wall that is too small leaves empty corners in the photos.
Watch out: real flowers wilt fast under hot lights. Choose silk or hybrid pieces for any event that runs longer than a few hours.
Marble, neon, and custom sign options
Marble panels give a clean, upscale look that suits black-tie events and corporate functions. Neon signs add a playful, modern touch and show well in dim rooms. A custom sign with the couple's names or the company logo turns a generic booth into a branded moment.
Plan the sign's wording before you order it. Short phrases read better in photos than long quotes. Keep text large enough to read from across the room.
Photo Booth Ideas for Events Across Different Venue Sizes
The size of the room changes what you should build. A booth that looks perfect in a ballroom can feel cramped in a backyard tent.
Here is how that plays out by venue type:
- Small rooms and apartments (under 500 square feet): Use an open-back frame with a 5- to 6-foot backdrop and a single prop table. Skip the printer and share photos digitally to save floor space. Keep the camera at 6 feet from the backdrop and angle the setup toward a corner so the queue forms along a wall, not through the middle of the room.
- Mid-sized venues (500 to 1,500 square feet): A standard booth with a 6- to 8-foot backdrop is a safe choice. Place it against a wall with the camera facing into the room, and leave a 4-foot-wide aisle beside it so guests can pass without breaking the line. This is the size where a printed-photo station earns its space.
- Large venues and ballrooms (over 1,500 square feet): A double-wide setup or two booths at opposite ends of the room cuts line time and spreads foot traffic. Keep each booth at least 20 feet apart so the lines do not merge, and confirm the room's ceiling height, a 10-foot backdrop needs at least 11 feet of clearance for the frame and lights.
- Outdoor events: Choose a weatherproof backdrop and weight every leg; a 10-by-10-foot pop-up tent with sandbags or stakes is the common pattern. Face the booth away from the sun's path so the light stays consistent through the event.
Power and access are part of the size plan, not an afterthought. Confirm how far the nearest outlet is before you commit to a spot, and keep the floor in front of the backdrop clear of cords and prop bins.
If you're unsure how much room you need, explore the Photo Booth Experience to see how booth setups scale for different events. When you're ready to compare configurations, browse our Photo Booth Rental options to find the layout that fits your space.
Modern Photo Booth Setup Ideas for a DIY Build
A DIY photo booth can save money, but it takes more planning than most people expect.
Camera, tripod, and printer basics
You do not need a professional camera to start. A recent mirrorless or DSLR camera, a sturdy tripod, and a basic printer will cover most events.
Lock the camera at eye level for most guests and add a remote trigger so people can pose without touching anything. Test the printer before the event, since ink and paper jams cause more delays than any other issue.
Step-by-step build order
Build the booth in this order to avoid rework:
- Set the backdrop frame and confirm it is level.
- Place the camera on the tripod and mark its position on the floor.
- Add lighting and test the exposure with a sample photo.
- Connect the printer and the tablet or screen.
- Set up the prop table within easy reach.
- Run a full test with three or four people before guests arrive.
The steps below show the order to follow when building a DIY booth, so rework is avoided.
| Step | What to do | Note |
|---|---|---|
| 1 | Set the backdrop frame and confirm it is level | Build first |
| 2 | Place the camera on the tripod and mark its position | Eye level for most guests |
| 3 | Add lighting and test exposure with a sample photo | Check before guests arrive |
| 4 | Connect the printer and the tablet or screen | Test printer for jams |
| 5 | Set up the prop table within easy reach | Keep within reach |
| 6 | Run a full test with three or four people | Done before guests arrive |
Lighting Ideas That Make Guests Look Their Best
Lighting decides whether a photo looks professional or flat. Most booth photos turn out poorly because the light comes from above or behind the subject.
A soft key light, such as a large LED panel with a diffuser, gives an even glow that flatters most faces.
Keep these lighting tips in mind:
- Avoid placing the booth in front of a window with direct sunlight.
- Turn off overhead lights that create harsh shadows on faces.
- Test the setup with people of different heights and skin tones.
- Bring spare batteries and extension cords for any outdoor event.
Good lighting also depends on power. Plan for enough outlets to run lights, a printer, and a tablet at the same time.
Free Photo Booth Design Templates and Layouts to Start From
Starting from a layout saves time and helps you avoid common mistakes. A simple template shows where the camera, lights, backdrop, and props should go, and it forces you to check the room's limits before you buy or build. You can sketch one on paper or use a free floor-planning tool, but the plan only works if it carries real measurements.
Try these three starter layouts, each drawn to scale with the camera-to-backdrop distance and guest zone marked:
- Corner setup (fits rooms from about 8 by 10 feet): The backdrop sits in a corner, with the camera facing it from 6 to 8 feet away. This works well for small rooms because the queue forms along one wall. Watch out: corner walls can bounce light back onto the backdrop, so angle the key light slightly off-axis to avoid a hot spot.
- Center setup (needs about 12 by 14 feet): The booth stands in the middle of the room, with guests approaching from one side and the operator working from the other. This suits large venues and keeps the backdrop visible from across the room. Keep the camera at eye level and mark its floor position with tape so it does not drift during the event.
- Doorway setup (needs a 6-foot-wide approach): The booth sits near an entrance to catch guests as they arrive. This draws the most attention at the start of the event, but it also creates the worst traffic jam if the doorway is narrow. Leave at least 4 feet of clear path beside the booth so arriving guests are not blocked.
Draw the layout to scale and mark five things: the camera spot, the main and fill light positions, the prop table, the printer or screen, and a clear queue line. Then run these setup checks before the event:
- Confirm the backdrop is level and weighted; a 10-foot backdrop needs at least 11 feet of ceiling clearance.
- Mark the camera position on the floor and test a sample photo with two people of different heights.
- Place the key light in front of and slightly to one side of the guests, with the fill light opposite, and check for glare on the backdrop.
- Trace every cord and tape it down; keep the path to the camera at least 36 inches wide for wheelchair and walker access.
- Post a short sign with instructions and a note on how photos will be shared, and ask guests before posting their pictures online.
Props, Accessibility, and Guest Experience Details
Props make photos fun, but they also need thought. Browse accessories for the most popular packages to see the add-on props and accessories that can be booked alongside a booth.
Accessibility matters for every event. Make sure the booth is reachable for guests using wheelchairs or walkers.
For a smooth guest experience, consider these details:
- Post simple instructions near the booth.
- Assign a staff member to help with lines and props.
- Set clear rules for sharing photos and respecting privacy.
- Ask guests before you post their pictures online.
Good guest experience also means fast service. Aim for a short line by running multiple prints at once and keeping the prop table stocked.
Book Your Event Photo Booth With Agondray Entertainment
Building a booth yourself takes time, equipment, and planning on event day. If you would rather focus on your guests, Agondray Entertainment LLC provides premium mobile DJ and photo booth services across Central Florida.
Veterans and first responders receive a 20% discount on our services. We also tailor our services to your event, whether you are hosting a wedding, a corporate function, or a milestone birthday.
For pricing details before you request a quote, read Wedding DJ Pricing in Central Florida: 2026 Guide. When you are ready to book, contact Agondray Entertainment LLC to check availability and talk through your plans.
Frequently Asked Questions
What lighting is best for a photo booth?
Soft, even front lighting works best. Place a diffused key light slightly above and in front of the subject, with a fill light or reflector on the opposite side to soften shadows. Avoid overhead lights, which create harsh shadows under the eyes and nose. Ring lights and LED panels with adjustable color temperature are common choices because they keep skin tones consistent across the session. Test the setup with a few guests before the event so you can adjust brightness against any venue lighting that cannot be turned off.
What backdrop works best for a modern photo booth?
Neutral or textured backdrops tend to photograph the cleanest. Greenery walls, marble-look panels, and simple fabric drapes keep the focus on guests while still looking current. Choose a backdrop that matches the event palette and check how it reads on camera before the day. Backdrops with fine patterns can create moire on some camera sensors, so test them at the actual distance guests will stand from the lens.
Are DIY photo booths suitable for weddings and events?
DIY booths can work well for small gatherings, but larger weddings and corporate events usually benefit from professional equipment, backup hardware, and an attendant who manages sessions, printing, and sharing. A DIY build needs reliable power, a tested camera and capture software, and a plan for printing and digital delivery. If the event depends on guests getting prints quickly, a professionally managed setup reduces the risk of a failure during peak hours.
How can you make a photo booth interactive?
Add props, custom signage with prompts, and a touchscreen or tablet that lets guests choose frames, filters, or themes. Offer instant prints alongside digital gallery sharing so guests can take a copy home and post to social media. A simple attendant who greets guests and explains the process also raises participation, especially at events where many guests have not used a photo booth before.